Thursday, November 7, 2013

How to Make Custom Palm Frond Fan

Yea!  Tutorial time!!!

What you will need: 
Dollhouse ceiling fan (if yours already lights up, skip down to the fan blade part)
Wired dollhouse light-LED or screw in bulb or something along those lines
Pliers
Super glue.
Wood glue
Card stock
Pencil
Cover for light


First thing you are going to do is disassemble your fan.  Gently wiggle the GLASS ball off of the brasss connector.  The glue isn't great and with a little bit of effort, it will come loose.  Remember, it is glass, so be careful.  
My fan here, is an already lighted fan, but someone cut the wire off at the very edge... making it useless, so I am replacing the light.

Here is what your fan should look like when all the parts come off.  You should have the glass ball, the fan blades, the wire shaft, the brass cover tube and the attachment for the glass ball.

First, you are going to take the fan blades and use them to measure the new fan blades (covers)
I just put the edge of the paper up against the fan blade center and then sketched a leaf shape around it. 

The next step is to draw the vein lines on.  Cut this one out and trace 7 more, for a total of 8.  Cut all of them out.

Now, here is the part that I don't have any pictures of (of course) but it should be pretty easy to understand.  After cutting the 8 leaves out, you are going to pair them up, both leaf sides out. Glue them together but ONLY on the rounded edges.  It needs to be left as a pocket.  When the glue dries, place on top of some foam and use a stylus to score the "v's" but not the main center vein.  You can then paint the leaves.  I used water color and acrylic.

Set them aside.

Take the light that you are planning on using and if it needs any soldering or you need to twist in the bulb, do it now.
Run the wire up through the pieces, starting with the connector piece.  If you want to change the color of the hardware, do it before you put it back together.  Spray paint can do wonders for miniature accessories.  :)

Continue through the pieces like this.  Don't forget to put the copper cover on over the wire shaft!  Glue the cover to the top piece only.  Do not glue to the fan blades, or they won't spin!

Here is the fan put back together, before the new blades are added.
Spinning fan blades!  With a RL fan in the background.  :)

The pocket blades that you made just slide right back on to the fan.  Secure them to the actual blades with a little bit of glue.
 Check to see that everything looks right! Then attach your light cover!
 Before the fan got a light cover....
 and with its light cover.

 To mount it to the ceiling, just drill a hole and pull the wires through.  Pull the fan tight against the ceiling and then tape wire down on roof to keep it there.

Happy making!!


Monday, November 4, 2013

Greenleaf Spring Fling 2013-A Bit About the Build

It always seems, for me at least, that the layout never ends up quite how I intended it to, or the way I initially saw it, from the beginning.  Originally, I wanted to include so much more on the outside!  But my real life house is full of doors.  And two, in particular, that the dollhouses need to be able to make it out of if we ever move.... Plus, I'm really running out of room to store these things....
 As you can see, the pool was originally sideways... and the shower would have been on the backside of the hose.  Plus, I had a really cool outdoor bar (something that was initially axed from the Mt Ollopa build). It got axed from here, too.
 The base of the house was just too big.  After a consult with my team of awesome friends, I moved the shower around to the side, turned the pool around and scaled down my plans for the pool deck. :(  Even in mini, we can't have it all.  Unless, of course, you marry some uber rich person that just has thousands of unused square feet in their gigantor mansion.  o.O
The kitchen layout changed, too.  I knew I wanted the back to be finished and removable, and with the house being so small itself, I didn't want furniture in the way...
 After initial dry fit and mock up, I started with the floor.  The grain of the kit wood was going in the right direction already and since this was a good quality laser kit (thank you Greenleaf!) I didn't see a need to cover it up with more wood.... So I just scored in some planks.  You can click on the picture to see better.
 I then gave it several washes of Warm White by Americana and weighed it down over night. While it was drying (I am missing a ton of pictures here, because I suck at taking the *stages* pictures) I worked on the bathroom.  The flooring for it (which you can see in the picture below) is the bottom part of one section of privacy fencing.  It got painted the same color as the main floor.  I cut the bathroom walls out of two layers of mat board and papered them and glued them to the sides of the bathroom floor.  It stayed a removable piece for a while.
 For the outside of the building, I didn't have the same luck with the grain, so Rustic Clapboard Siding to the rescue!  This is the same stuff that I used on Mt Ollopa.  I did all the sides of the house this way, including the back wall, which I cut from the solid wood piece from the pier kit.  You can see in the following picture, that I filled in part of the window.  I had to change the dimensions a bit to allow enough height for the kitchen counters to be in front.
 Once all the sides were dry, I took a razor knife and cut off all the excess siding at the edge.
 My inspiration picture has board and batten siding- which I love- and I used the strips from the roof upgrade to make the segments.  Perfection!! The Window and door trim is tacked in place with mini wax so I could make the proper cuts.  In the final build, the door frame trim isn't there on the outside... I managed to lose it, and as you can see, it needed to be a very specific fit.
 It looked so cool, even before it was painted!
 To keep the wood from warping, I did the outside gluing and the inside priming and papering all at the same time.  When it was all dry (yeah hair dryer!) it was time for another dry fit.
 Looking pretty good!  I will have to come back and let you know the names of the papers I used... I think Fishscales (blue) and Linen (cream) both by Recollections....And the green came from a large book....
 Making the cross buck door wasn't too terribly difficult.  I left the siding off this part and used just the kit wood as the backing. I used laser cut wood from the pier kit to make the parts.  To make sure placement was right, I laid a fence section (meant for the shower) down on the board  to keep me from getting too far over.  I also made sure to pay attention to the siding pieces so that it wouldn't be butted up next to one of the strips.
Here are all the building pieces before painting them.
I find, that when choosing a color scheme, it helps to paint a swatch on the same sort of surface you will be using.  So here are my swatches that I made on some the excess strip wood.

 I chose to use Dusty Miller by Glidden for the main house color.  Some time ago, Home Depot discontinued these and sold them for $.50 a piece down from $3.00.  SCORE!!  I bought, like, $30 worth for myself and my mother-in-law.
All the pieces for Dusty Miller got two coats.
 All the white is Snow White (Titanium White) by Americana and the turquoise is a custom mix of turquoise, sour apple green and bluegrass green.
 The screen door was sanded, painted and then assembled using Gorilla Glue, but only the tiniest amount.  It was clamped shut over night.
 You'll notice here, that I ended up switching the doors.  That wasn't on purpose.  They were supposed to go this way... but I think they a)fit better the other way and b) I must have decided they looked better.  
 My final shot for this post is to show you my super helpers for roof construction.  These little silver bulls.  They are really heavy for how small they are!  A gift from a family friend, they were certainly meant to hold paper down... but I think the were bull enough to handle a really big job!
 Be back soon with tutorial posts and more about the house build!

Saturday, November 2, 2013

Greenleaf Spring Fling 2013- Loblolly Westcott House detail shots

First of all, thank you for so many kind comments on Loblolly Westcott House.  I really appreciate it and every artist needs ego fluffing.  It's how we keep going!

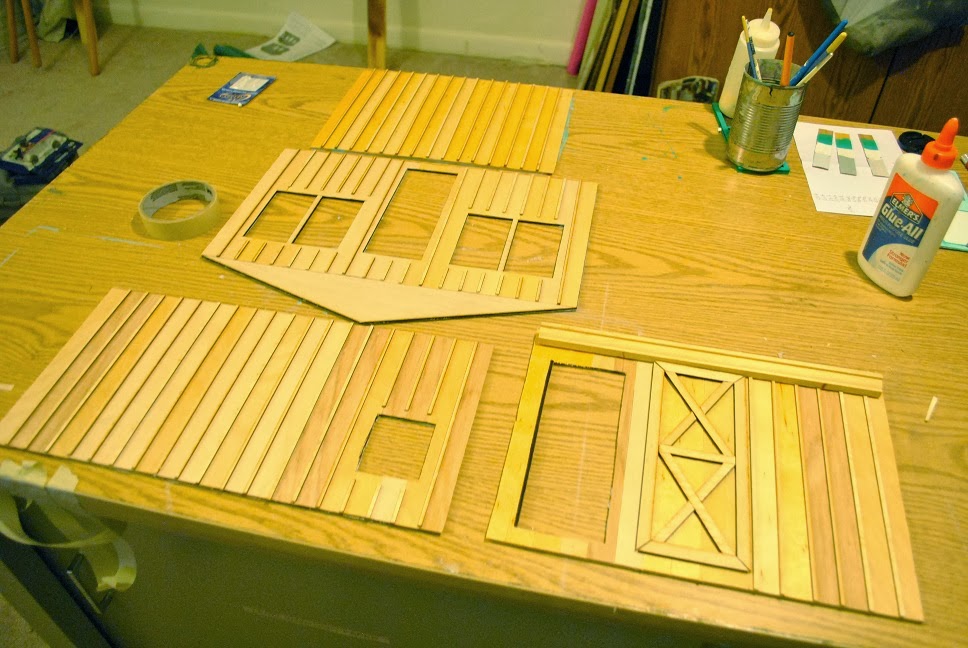
There are so many great details of this build, and even more that I didn't get shots of.  Big DSLR's take fantastic photos, but they aren't so great for getting into dollhouses.  :)  I'll try to borrow my son's camera and get some shots...

The bathroom in this house is the smallest room I have ever worked with!  The walls are made from scrap wood from the pier kit and matboard.  The door is two layers of mat board.  The toilet in here is borrowed from Mt Ollopa.  I used it for staging and then totally forgot to get another one...  Good thing the Lodge isn't booked right now!  The mirror is made with real mirror glass that I got from Michaels. It's a 2x3 section, and the frame around it is made from card stock.  A few well placed layers of card stock and some wood glue and Vanilla paint by Americana and I got a pretty great mirror for above the sink.
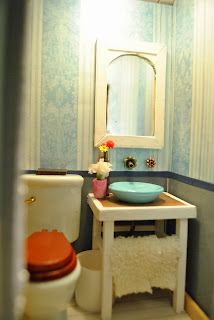
The counter was scratch built from basswood and skinny sticks.  The top is stained maple and sealed with a few coats of Delta Ceramcoat Satin finish.  The basin is a bowl I had in my collection... it was white with some china blue flowers on it, but I threw some Robins Egg spray paint on it and some clear gloss spray.  The faucets are made from jewelry findings.  I made the vase and flowers, too.  The tall skinny vase in the back was purchased from.... somewhere, most likely HBS.
 I have been spending too much time with Brae! I event took the time and effort to make a drain pipe for the sink.  I used a long hollow jewelry finding, heated it up and bent it until it had a shape I liked.
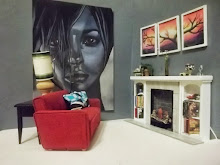
This light is custom made using a can light, a metal eyelet and a glass bead.  I really love the way it turned out, and it's the brightest light in the house!  The wall art is a scrapbook embellishment.
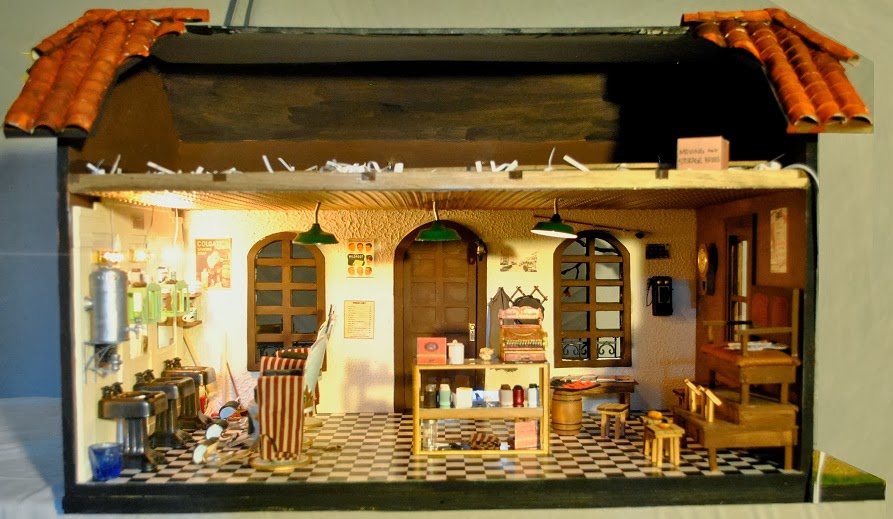
The kitchen turned out better than I could have hoped.  That little sliver of light at the roof seam bothers me, but there seemed to be a lot of trouble for people getting the roof on.  The cupboards in here are a mix of cupboards from a purchased set, Michaels hutches and an oops order.  Teehee.  The little shelves that are below the working doors there were meant to be kitchen counters....I ordered them to make my life easier.  One was to be the kitchen island and the other was going to be a  __________ in my other build I have going on (CC for HBS).  I didn't pay close enough attention though, and ordered them in 1:24.  So, improvisation!! All the dishes have been accumulated over the last 3 years here and there...
 The tea kettle here was part of a kitchen set that James bought for me last Christmas.  The range hood on is made from bass wood and painted in Gunmetal by Americana.
 I loved getting to use the tile sheet for the backsplash!  I studied a lot of kitchen layouts in home decor magazines and on HGTV and I think copper tin backs are right up there with subway tiles (which I will be doing in my UU).  At home, I keep my most used utensils in a pitcher just like this.  My mom kept all of hers in a wide mouth vase when we were growing up.  She still does!
This trash can here is nothing more than a mouthwash cap!  I took and old rag and rubbed Bittersweet Chocolate all over it and then cut the corner off a black garbage bag to make the liner.  :)
 I couldn't find small wooden letters that I liked and that weren't a ridiculous price, so I cut these out of mat board.  :)  I love it!

 I ordered this mug holder from HBS.  When it comes to you, it's a horrid brass finish.  Blech.  So I spray painted it with the same blue as the bathroom sink. :)  MUCH better!


 This great little cutting board here, was a gift from Jane S of minifanaticus (go there and see her super awesome SF2013 entry!)
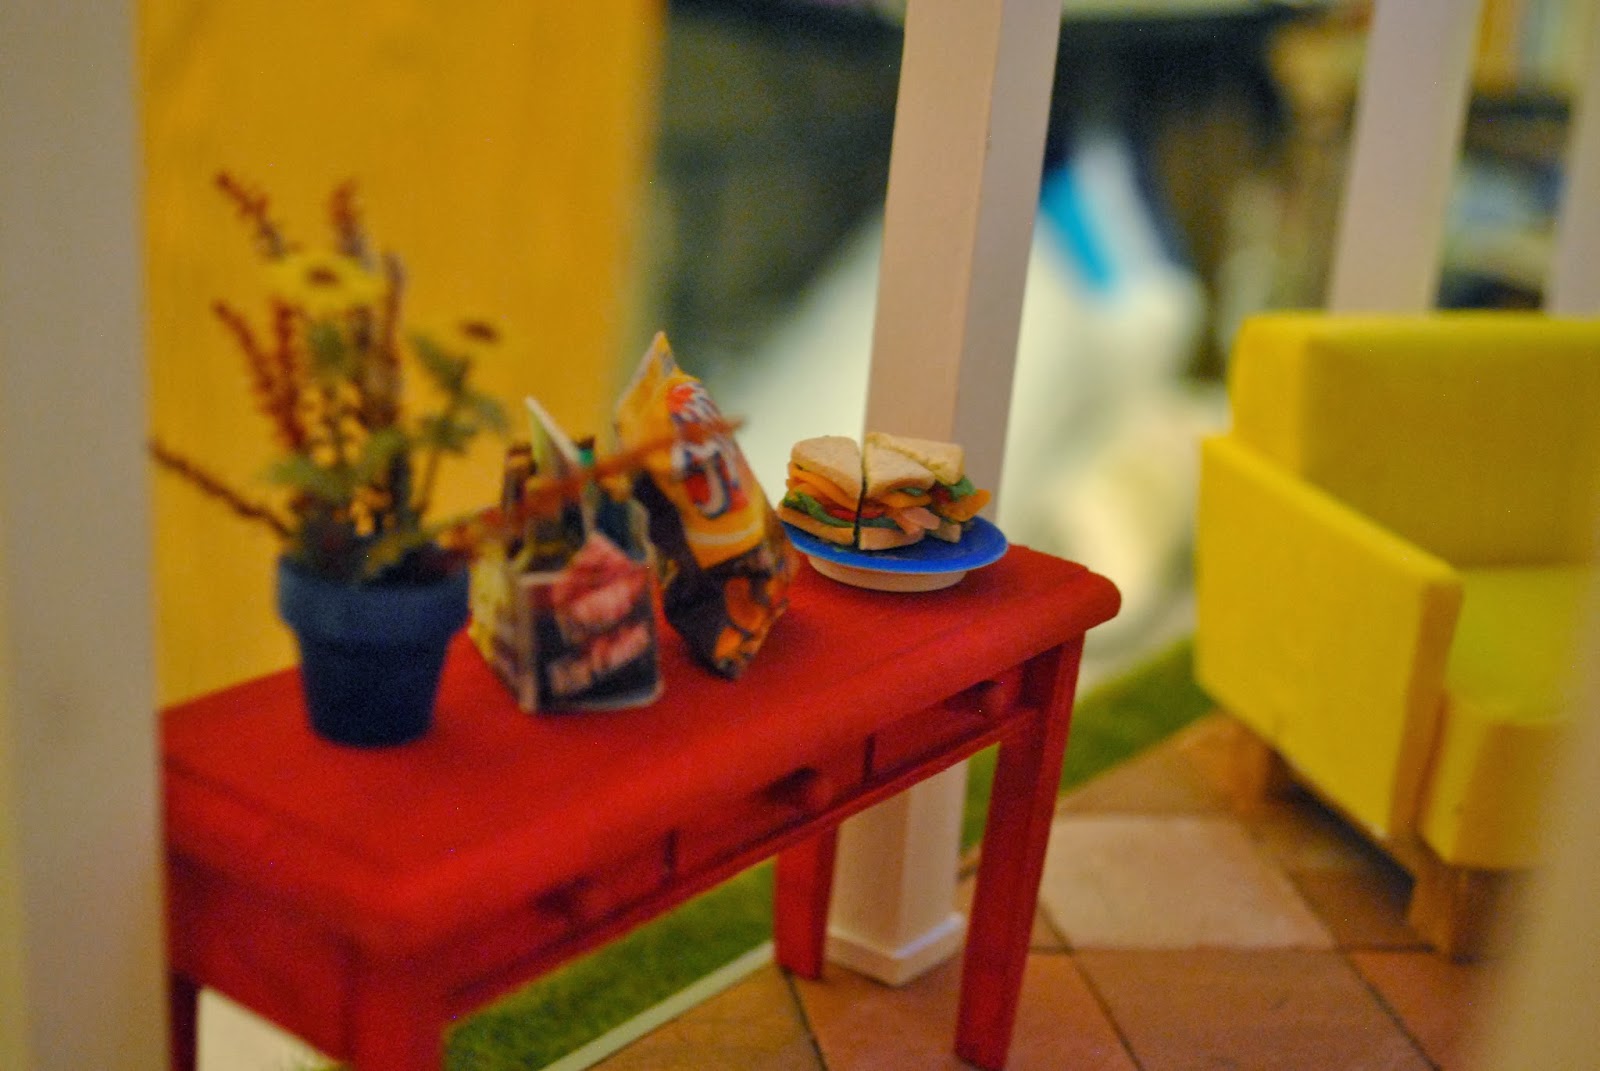
 I made the bread and the salad.  The cutting board that the bread is on is just a sanded smooth piece of strip wood.  I meant to make a knife, like the ones I made for Blondie, but never got to it.
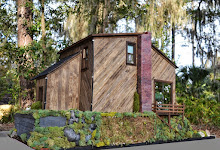
This shot is from early in the build, before the roof was on.  But I wanted you guys to see that the back finishes it off.  I made the frame for the large mirror in the same fashion as the bathroom one.
 The little Dollar Tree side board that could!  This was the first piece I made for this build.  I will do a construction post later for the things that I made. The clock and picture frame are charms for a bracelet.  The candle piece is from Jane.  Turtle is from HBS and the basket if from Michaels' Easter collection.  The rug there is a sample of fabric wall paper!
 One of my favorite shots. I was trying to get a picture of the armoire.... which is full of towels and books.  On top, there are candles, books, flowers and a turtle bead that I painted white to look like milk glass.
One of the other things that will get a construction post is this fan light.  I made it from scratch and it is so cool. :)

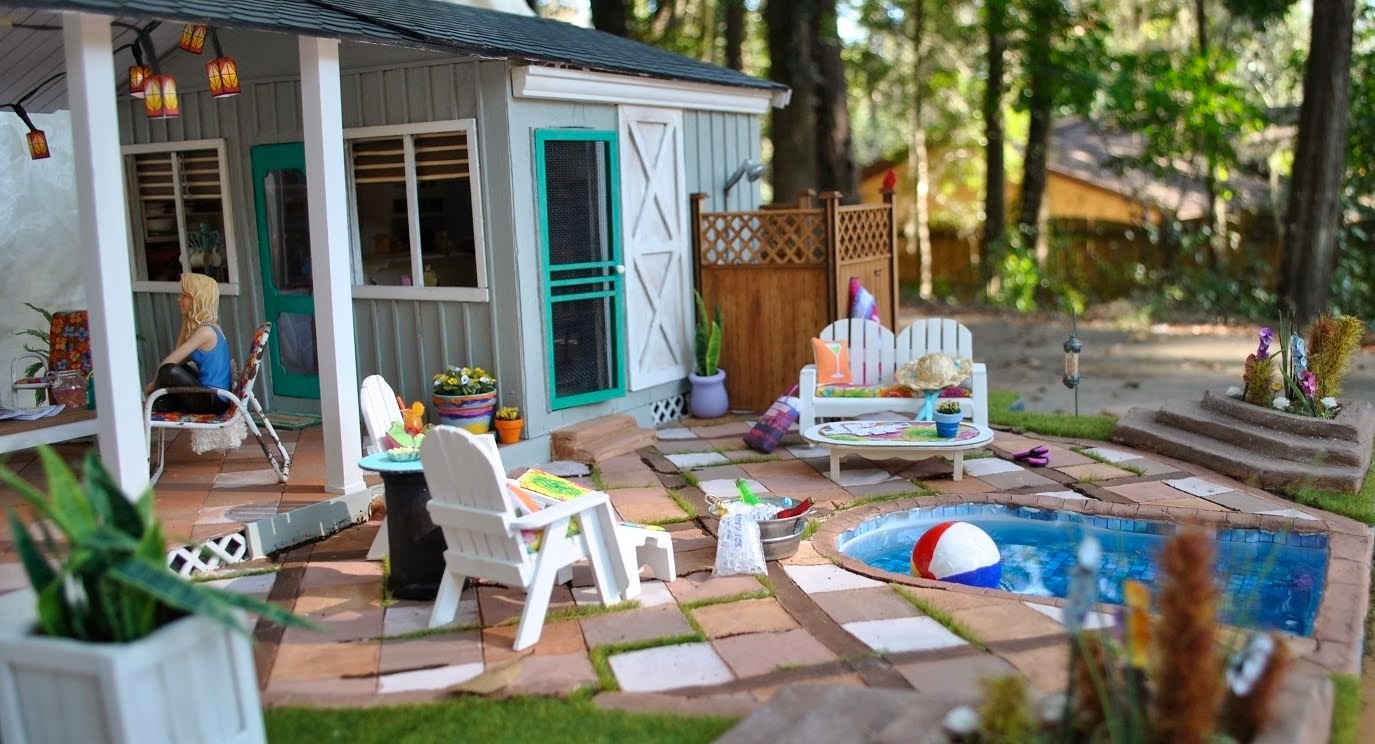
 I love the outdoor shower.  In the mockup, it was on the other side (the back) but that made the base SOOOOO big, so I moved it.  In theory, it shares plumbing with the bathroom sink and toilet... so it makes more sense for it to be right here in that aspect, too.
 I used two sets of privacy fencing to make the shower walls and stained them in maple.  I tried to get some areas thicker with the stain to slightly weather and age the wood.
 The shower head is made from an ear bud.  I cut it at the very end of the plastic/rubber where the cord started.  Then I took a skewer and sanded it smooth, before super gluing the ear bud to the top of it.  The whole thing got painted with matte aluminum and then touched in spots with Antique Copper to rust it up a bit.  The faucet handles are jewelry findings.
 The little bench in here is made from left over pieces of the privacy fence.  The towel is washcloth and the bottles are Battleship pegs.
  I bought this bird feeder from Brae, of otterine.com and then fashioned a shepherds hook out of some wire I had.
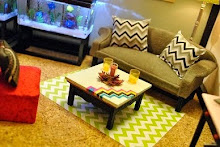
 This patio set was a gift from a friend of mine.  She found them at a yard sale for $1 and figured I would have some use for them, and I totally did!  I made the flowers and the flipflops.   I had the hat in my possession already.  The martini pillow is from WhimsyCottageMinis on etsy (as are the other cocktail pillows).  There is a bag on the far side of the loveseat and it was a gift from a miniaturist participating in MJ's world travels.
 I made the beach ball from a ping pong ball and filled the pool with real water.  The ice in the drink bin is 3 cut up suction cups.
 I love that the door is ajar here.  Not meant to be... just wouldn't fit properly.
 Poolside solitaire.  A printout from Jim's Printables.  What a pain to cut out and assemble!!
 Handmade flowers for the raised flower garden.
 The cocktails were gifts from Blondie and they were pucrchased from EverydayGourmet.

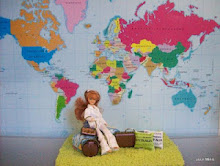
 I finally bought a couple resin dolls from HBS to check the sizes of chairs.  I always worry that they are too big or too small, but it seems they are just right.
 The table and fireplace are scratch built.  As were the caladium plants and the fern.  The stuff in the firebox is from mini swaps.  I printed out the magazines, too.  The citronella candle is from Brae's shop and she gave me the rusty patio furniture for my birthday. Lemonade from Blondie-bought from everyday gourmet.


 I love "through the window" shots.  :)

More pool goodness!


 Made drains around the porch using parts of the latice fencing.


Hope you all enjoyed!  Can't wait to tell you how things were made!!