Tuesday, December 11, 2012

Undersized Urbanite: An Eclectic Tennyson

After some prodding from my blogging friends, I am going to enter the Undersized Urbanite.  I am doing this one just for fun.  I know the competition I am going up against and I don't think I will waste my daydreams on delusions of grandeur. HA!

Anyway, for the longest time now, I have wanted to do a Dream House build.  In fact, I have wanted to do several.  That's what my blog name is for, anyway!  There are several things that I would love to have in my big, real life sized home, but time/money/the fact that I rent, make a lot of those things damn near impossible.  SOooooooooo....enter the wonderful world of minis!  Every housewife's dream!  Everything the way you want it.  Everything neat and in its place. Laundry and dishes stay put away, the toilet seat is always down and toilet paper hangs on the roll-instead of lazily placed near(ish) the toilet.  *sigh*  The. Best. Thing. Ever.  And you know, I think that really is the HEART of why I love miniatures so much.

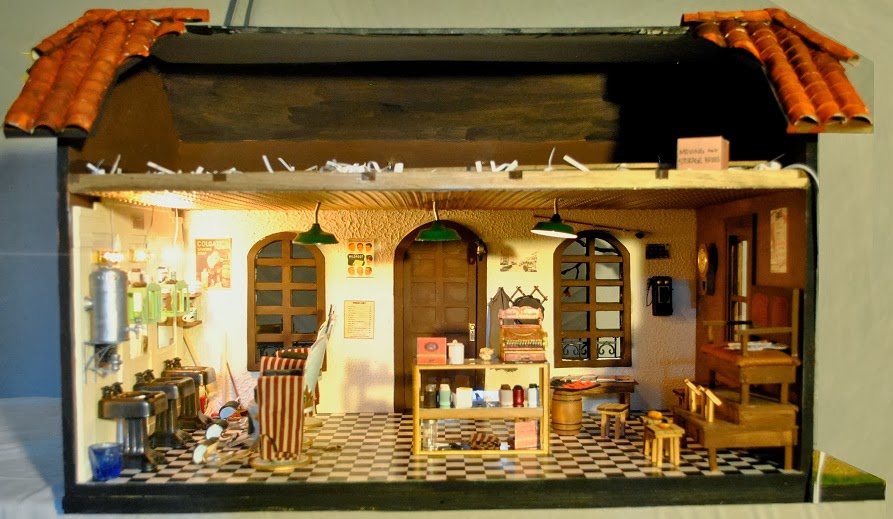
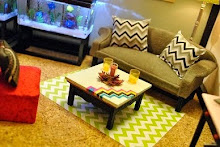
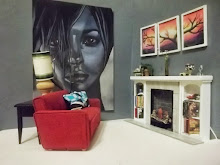
Now, I have a very eclectic style.  I love the simplicity of craftsman style.  The femininity of shabby chic.  The comfort of rustic.  The lines of modern.  I love when random things are upcycled into wonderfully bizarre furniture (piano shelf).  I like color patterns that punch you in the face when you walk into a room.  I also love classic, matchy matchy.  I like the ratty old burnt orange chair that you don't want to get rid of because it is THE most comfortable thing on Earth.  Ugly as sin, but so delightful to sit in.

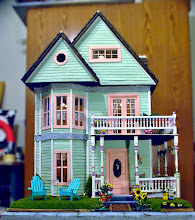
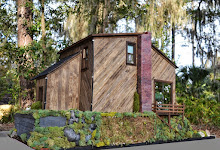
THIS will be my next build and my entry into Undersized Urbanite.  Me.  Me in a house.  And I will vainly name it after me.  :D

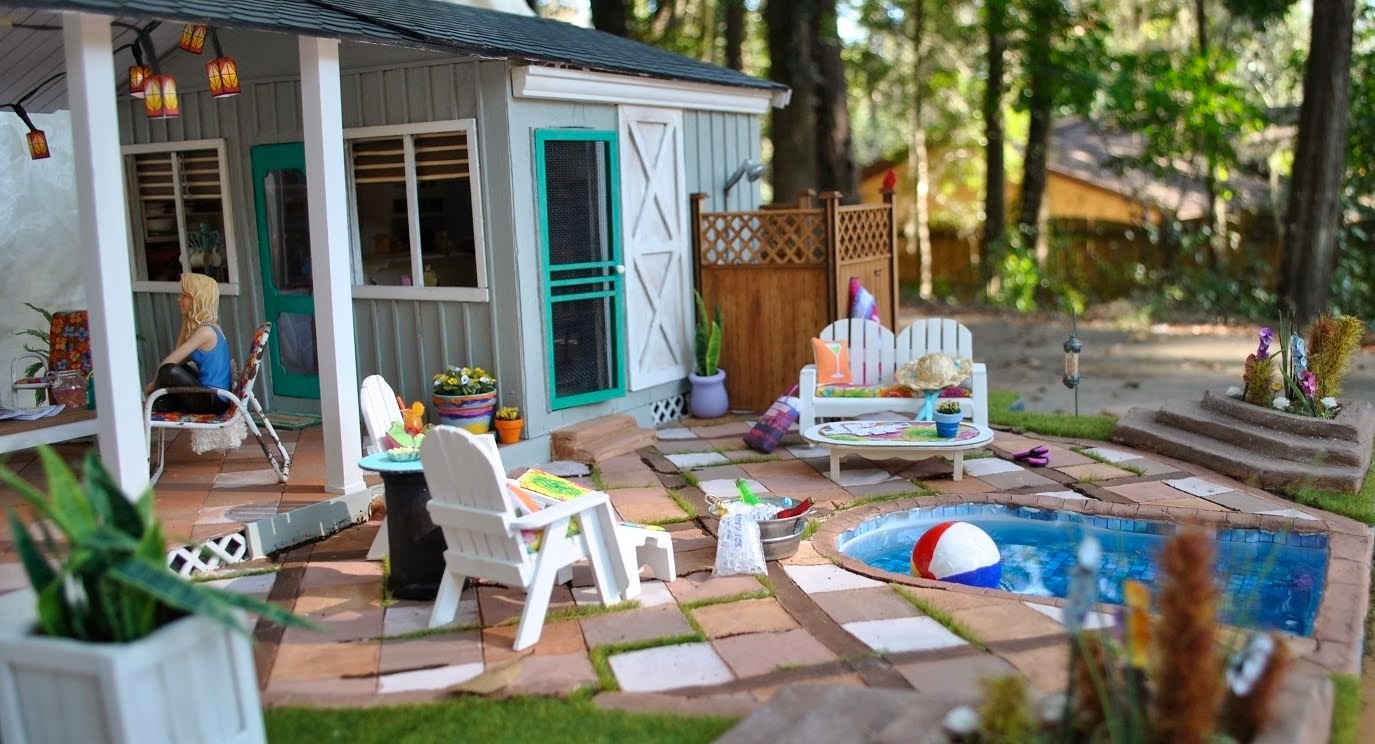
Since I just spent the last 9 months or so hoarding money for Mt Ollopa Lodge, I am going to try to only make things for this house.  Work with materials on hand, and only allow money for electric and for landscaping.

I have some crazy ideas, y'all.  You are going to love it.

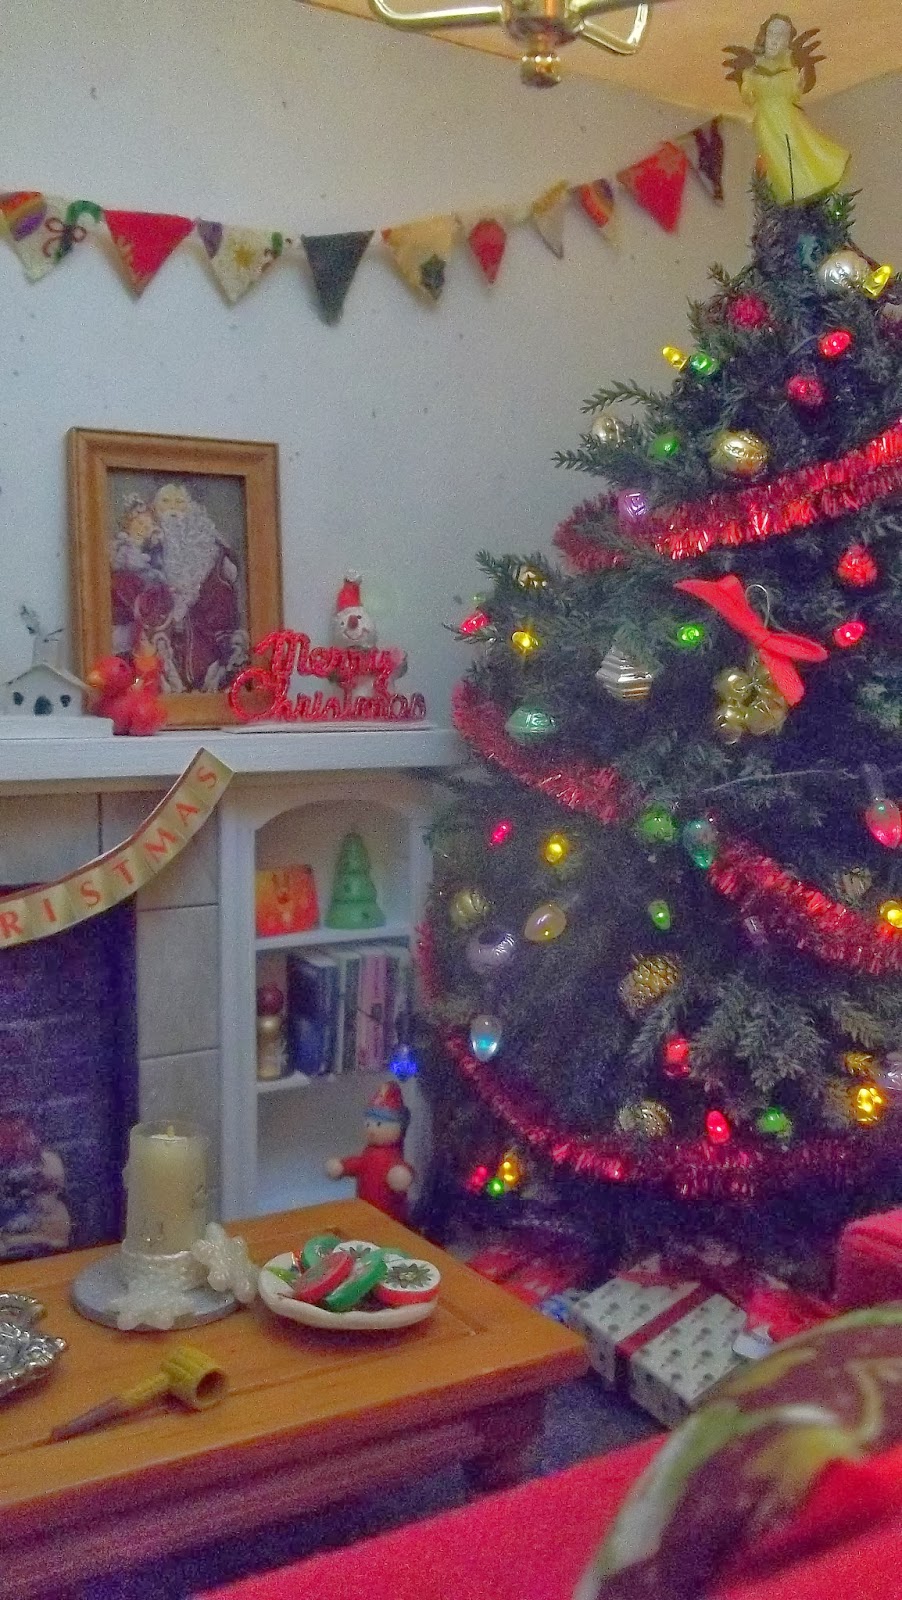
Some elements I plan on using are:
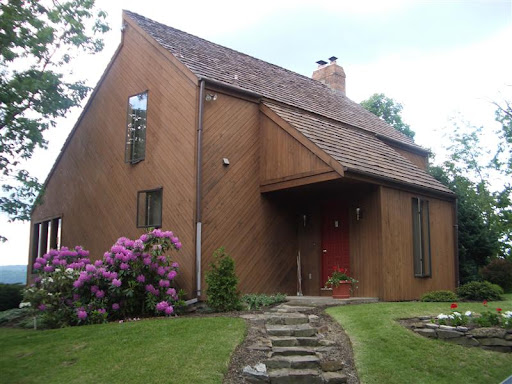
                          For the entry way, classic and rustic combo.
Photo from Pinterest, but original credit to The Lemonds Family Blog
                          For the bathroom, upcycling and shabby shelving:
Credit to Be Different, Act Normal
Not sure how I will pull this off in mini, but I will!  You all know I am sucker for a good DIY, mini or big!
Credit to Crafty Nest
Another random item turned into something way cool!
Credit to Pinterest, original link unknown.
I obviously need to have a space with lots of books. :)  This will be in the library study.  Colors will be different, but the basic idea will be the same.

Credit to Hibbing Public Library, but not sure where original goes to past that.
A punch of color!  I LOVE this look. Seriously, love it.  And yes, I will be combining shabby, modern, classic and color, just as they did here.  LOVE. IT.
Credit to unknown source.
And the lovely little attic space?  Yeah.  It'll get something like this.

Credit to Lavender and Ash.

Hope you are looking forward to this as much as me!  Should turn out quite awesome.  :)

PS.  I did two posts in one day!  Here is the other one: Where the Lodge Started

Where the Lodge Started

When I first decided to enter this challenge, it was right before we were supposed to move into a new house, so it sat in mock form for a while.  Brae was really good about poking me with a cyber stick to get moving though.  :)

Here is the initial dry fit.  I love how quickly it goes together.  See that the door was originally over to the side.

I always knew that I was going to add that addition to the "back" and turn it into the "front."  And I knew that I would be using a sliding glass door to go out to the deck, although, the original deck was much bigger.  The chimney and fireplace were also something I intended on adding, but their location changed when I decided I really wanted to add a bathroom.


This little frame here, was supposed to be the removable wall.  It was going to be a wall of long, skinny windows.  I loved the idea, but ended up not doing it a) for time constraint and b) after discussing it with Brae, decided that the aesthetics were better without it.


This end stayed pretty true to plan, except that I knocked out a window.  I didn't think that you should look through a window and see the side of a staircase.  The inspiration house had a spiral stair, but I wanted something a little more rustic.  Thinking back, I think log step stairs would have been AMAZING, but I do like the maple on white that I went with.


The inside layout changed a bit, too.  I had to fill in the door gap, fill in and raise the window that busted into the bathroom (this happened when I decided to do a wall-to-wall-floor-to-ceiling slate shower) and the little window in the kitchen got moved over.  I also cut a large arch in the middle.

It wasn't until after we moved that I finally got the wood cut.  And this puppy took up the work table for the entire time.  It wasn't really movable, at all.


 I had even cut the window pieces, but hadn't sanded them down yet.  I also did this with the Dremel Trio, since it was before I had my band saw.  Note that the roof was planned to be solid.  But then I realized you couldn't really see the loft bedroom and office, so it was later changed to a U-shape like Greenleaf Dollhouse Kits are.  This roof board, was then planned to be used as the deck board.... before I scrapped that plan, too!!  HA!  Cutting and fitting the rest of the loft floor was a PAIN in the rear.


Even in mock view, I love this angle!


Next, we will move on to individual rooms.  First being the entry way.  It was a quick and easy tackle and it really gave me a feel for how the rest of the house was going to turn out.  I loved it instantly!

Wednesday, December 5, 2012

Unveiling Mt. Ollopa Lodge: Creatin' Contest Entry 2012

The kind folks at Hobby Builders Supply finally gave me the go ahead to share this with you!  Feast your eyes upon Mt Ollopa Lodge, my entry for the Creatin' Contest, 2012.
                                      ~.~.~.~.~.~.~.~.~.~.~.~.~.~.~.~.~.~.~.~.~.~.~.~.~
I love this build, and I hope that you do, too.  I was searching Lodges one night on the internet, for no real reason... and I came across The Eagles Loft, which is in Pennsylvania.  Seriously, it was love at first sight.  And can you blame me?

The Eagle's Loft Lodge.  My inspiration.
I wanted to do an exact replica, I loved it so much.  But then I would have needed to do it in half scale!  The grounds surrounding the house are just as beautiful and the views are breathtaking.  I had started to compile ideas for it late last year.  (I have another folder that has ideas for Rosehill Cottage!)  When they released the kit for the Creatin Contest this year, I immediately saw the main structure of this house, and I RAN with it!

I will post breakdown posts and talk about each part of the build, but this is just for you to see the overall end result.  :)  I need to thank Brae, Keli and April for talking to me throughout the build and helping me keep my sanity.  It really helps to have a crowd not only cheering you on, but pointing out glaring mistakes when your eyes have started to cross.

I learned a lot on this new build, mostly about landscaping, but also about LED battery powered lights and making them your own.  I also played paper clay and new materials like resin and water putty.  :) It has been a trip! 
Picture 3 for Creatin' Contest 2012

Picture 1 for Creatin' Contest 2012 

Picture 2 for Creatin' Contest 2012
Picture 4 for Creatin' Contest 2012

Now for some close ups!
I really wanted to have a water feature, so I squeezed this little pond on.  

The original design was supposed to have a much larger deck, featuring an outdoor bar, adirondak chairs, a grill and a telescope.  But sometimes, you have to keep it small (er than you want).

One of my favorite parts was adding washes to the paper clay to get this stone look.

Paper clay, builders foam and reindeer moss.  Seriously, the landscaping on this was such a blast. And even more so when I found a link to the caladium leaves on Greenleaf!

A complete view of the back of the Lodge.

The front entry was one of the first things I did.  And then I had to compromise on the landscaping here. Originally, I wanted to have rolling grass like The Eagle's Loft has, and I wanted a Jeep Wrangler parked up front.  *sigh*  Expect a similar build in the future!

Love this little plant!  And how about my scratch built faucet?! I sort of love it to tiny little pieces!

This was a test run picture taken inside.  I am really glad that I got to take them outside! Although, this corner of my house probably my favorite part to look at.  :D

Some of the best shots, were me shoving my little PaS camera into the window and seeing what came out. This one features one of my paintings in the background.

This one has my normal, very leafy and brown, yard.

I love this shot simply for the shadows cast on the wall.  :)

The study corner, for the writer that lives here, was so quick and fun to build. The railing on the other hand.... well, that involved a lot of.... a lot of things. ;)

Brae made me so happy when she said that I really nailed all the little details in here. What do you think? Look hard! I really got into it!

This is taken right of the left edge of the open wall.

I made my first pitcher of juice!!!!

I adore everything that I chose for this room.  From the paper to the color of the furniture , to the fabric of the curtains.

This came together much better than I anticipated!  And doesn't my blanket from Brae look so good here?!

Yes, we let the dog stay in the bed. :)

I made the fish in the bowl!  The silver thing is reused from another build. The decoy is from seller restless61a on ebay. And I made the birdhouse.

The painting is by me, the pillow on the chair is by Brae. the pictures are actually of me and James at our wedding and on our honeymoon.  The curtain fabric is a maimed tube top!

This is one of my favorite shots.  Another plan that was scrapped, was that the open area back there was supposed to be a wall of windows.

The mantel is perfectly cluttered.  Decoy and jug are from ebay seller restless61a. I made the birdhouse, books, painting, Harvest blocks, candles and plant.  The candlesticks holders are the ones I redid at Brae's in October and the vase is from the ebay seller.  The picture is of my cat, Apollo.  He was my very best friend for nearly 18 years and this build is named after him.
The bathroom was one of the hardest areas to shoot, but one of the most fun to build. It is ENTIRELY scratch built... well, minus the toilet.  :)

Even has soap and a loofah!  Wish you could see the shower head. 

And here is where so many baskets ended up and where the hall tree went!

Love this entry way!

Kitchen.  :)  Funny how I didn't notice until now that the cereal there is upside down.

Simple cooked food (since there is no stove here) and some junk snacks, too.
I hope that you enjoyed this quick stroll through Mt. Ollopa Lodge.  I know that I have enjoyed it, immensely.  The following posts will be a breakdown of the things that I remembered to document as well as a closer look at each room.  :)  Thanks for stopping by and wish me luck!  I would LOVE to win!

Monday, November 26, 2012

Paintings and Veggies

Over the summer, I was a crazy mini making machine, preparing for my first craft show.... which we all know, was an epic failure, didn't go so well.  I would take it personally, but it didn't go at ALL for ANY of the vendors. So, my feelings were only mildly hurt. Anyway, I just now got around to listing a few of the items from then.  I still have a lot more to go, but pop on over to my etsy shop to see what's the what.  :)

I have to get back to shingling now.  Bleh.  Next week, I will unveil the mystery build that you all have been waiting on!  Until then, here are some shots of the new stuff, listed and unlisted: