I knew exactly what I wanted to do with this kit when I saw it. There aren't any pictures of the initial dry fit, but there are a few from after I cut a bunch of holes in it!
This first one here shows not only the set up of the house, but also my kitchen counter-the cleanest it would be for the next 3 months (minus the one day for my son's birthday when it was all banished to a shelf).
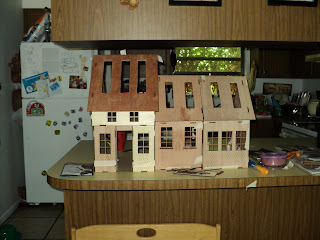

At first, I had wanted to put a bay window here. See the pencil marks? I thought it was more visually pleasing, but it made the room inside impossible. So I went with a traditional four light window instead. The roof edges, where the two additions meet up had to be cut down to slivers. I had to remove the overhang on both to be sure it would sit flush together. Also a total pain!

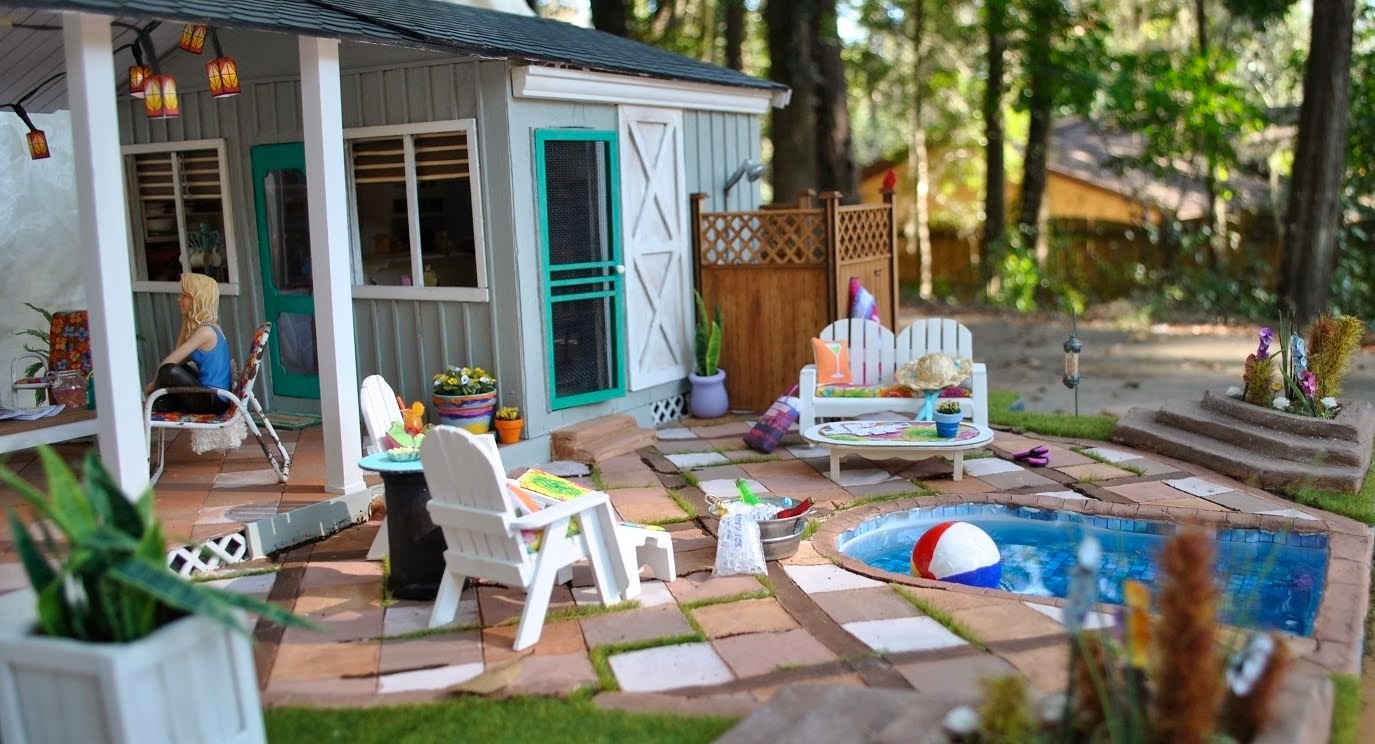
Here is the mock-up of the indoor set up. And my house beyond. :) I had to condense a lot of my ideas for this project. Since it is something that I actually want to open in reality, my mind went crazy with ideas and was trying to cram too much in there. In a full scale Ageless Promise, there would be more studio space, storage in both rooms and extra easels. There would also be an outdoor space to paint. I had purchased the steps and porch for this, but the building was already enormous, so they didn't go on.

Now the doors are cut out and windows installed. There is also a mock up (straw) for the spiral staircase. The second floor had been cut away to make the rooms bigger and airier, along with the purpose of providing sense to the skylights. They just seemed silly to be lighting up a floor right there! A little bit of the floor was left to help maintain structural integrity and to have a built in shelf to hold extra supplies. You can see a few of the furniture pieces tacked up temporarily as I play with the layout.
 Here are a few of my *putting it together* shots. I learned, frombuilding the Coventry Cottage by Greenleaf, that it is easier to decorate as you build than it is to decorate with big oafish hands after you have built. So, I dry fitted, Measured, measured again and cut paper. All the paper in this build are from wallpaper sample books. Coordinating ones, at that!
When it was in dry fit, I marked all the points where wood touched wood. When I cut the papers, I cut just a little over-and I mean a SLIVER-the marked lines. Then I primed the wall in necessary spaces and glued the paper on using a craft stick.
While the walls were drying, I used Greenleaf Vinyl Tiles to make the floors. Toothpicks were my spacers to begin with, but that looked weird, so I just eyeballed it from there. My grout was made from joint compound (buy at Walmart in giant bucket for $5) and some acrylic paint mixed in for color. I then scooped all of this into a sandwich bag that I had put a cake decorating tip in. It is shoved through a bottom corner. Once the bag was full, I sealed it shot and squeezed (piped) the *frosting* out into the holes. I wiped the excess away with a dry cloth and light pressure. When all of it dried, I gave the tile a good washing with a damp cloth.
Then, after the floors were dry, I put in a dry-fit again, measuring where the floor hit and marked for baseboards. Also marked where the baseboards would run into each other in the corner, and mitered them so they would form nice angled corners instead of a butting joint. :)
They were then painted and attached with Aileene's Tacky Glue.

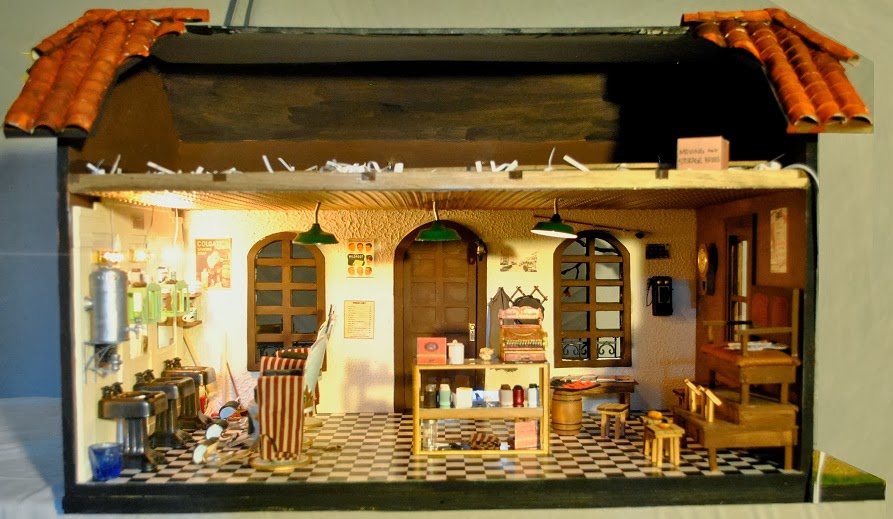
Here is that room assembled with the furniture inside. The pictures I didn't get to take were the ones showing how I attached the three built pieces into one giant piece.


Is very nice! Congratulations! Hugs.
ReplyDeleteIsn't it fun to look back at where you started and think...how in the world did I get it finished in time?!!! :D
ReplyDelete